Tuesday, October 12, 2010

Baked Ziti with Vegetables

To my knowledge, I've never eaten a ziti and I certainly have never made one, but I've always loved the name. Ziti. Ziti. Ziti. Isn't it great?! When the spinach manicotti was gobbled up, eldest daughter was still fuming that she didn't get her fair share, and she pleaded for me to make another. She kinda had a point, because her sister and I eat like normal people and she eats like a bird, but I didn't want to make exactly the same recipe right away, so I decided it was time to investigate Baked Ziti.

I didn't want to make a classic ziti, which is primarily a pasta and cheese casserole, sometimes with meat – I wanted to fill it with vegetables. I often scheme how to get more vegetables into my kids. They like most vegetables, and they do eat salads (especially the dancer), but feeding them a variety of cooked vegetables can be a challenge, and vegetables are where the nutrition is, baby. :)

Neither daughter cares much for mushrooms, but the eldest will eat them if they aren't obvious - she has stated it's ok in this situation. (The youngest would feel betrayed if she discovered that I hid them in her food, but she's not around this week and, even if she were, she's eating gluten free for the next few weeks.) So I decided that mushrooms would definitely be included, and also zucchini, another veggie she isn't crazy about. She likes carrots and spinach, so of course those would also be included.

I had trouble finding a recipe that met my requirements. There was a Baked Ziti Primavera on allrecipes.com that was kinda sorta what I wanted, but not quite. There was an uber healthy Baked Ziti with Vegetables on the Mayo Clinic website. I used features from both recipes, added my own ideas, and here you go. I have no idea if it's anything like a "real" ziti, but it's a pasta casserole with vegetables and cheese and the mushrooms are almost invisible, so it's a "home run", as far as I'm concerned. :)

Baked Ziti with Vegetables

Pasta
  • 1-16oz box Barilla Ziti pasta (or equivalent)
Vegetable mixture
  • 2 small zucchini, finely diced
  • 2 carrots, finely diced
  • 1-8oz box crimini mushrooms, finely diced (any sort of mushrooms could be substituted)
  • ~5oz baby spinach (I used most of a 6oz bag of Trader Joes organic baby spinach)
  • 1-14.5 oz can Muir Glen Fire Roasted Diced Tomatoes (or equivalent)
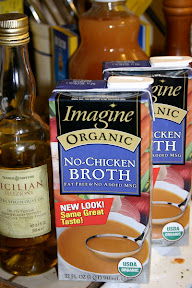
  • 1/2 cup No Chicken broth
  • 4 cubes Dorit crushed garlic (or equivalent)
  • 1 tsp dried oregano
  • additional broth, or water, as needed
  • salt and pepper to taste
Final mixture
  • 1-24oz jar prepared pasta sauce
  • 1-15oz container of ricotta
  • 2 Tbsp fresh basil, cut into chiffonade, or 2 tsp dried
  • 1/2 cup grated cheese mixture (plus extra for topping)
  • parmesan (also for topping)

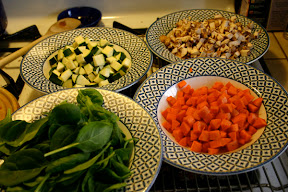
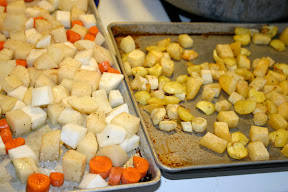
A little mise-en-place

Instructions:

  1. Preheat oven to 375°F.
  2. Bring a pot of water to boil and cook ziti, as directed. The Barilla box says to simmer for 11 minutes. Drain and set aside.
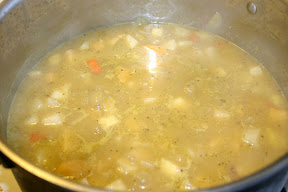
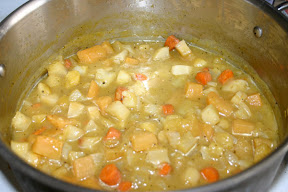
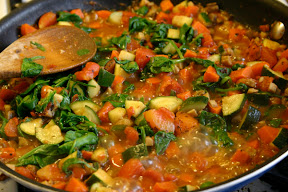
  3. Heat a large skillet and add about 1/2 cup broth. When hot, add the carrots and cook for a bit. Then add the zucchini and mushrooms and cook for a bit more. Add more broth, or water, as needed. Finally, add the diced tomatoes with juice, the spinach, the 4 cubes of crushed garlic, the dried oregano and dried basil (if using dry). Add salt and pepper to taste. Cook until all veggies are cooked and it tastes yummy.

  4. In a large bowl, place the veggie mixture, the ricotta cheese, the fresh basil (if using fresh - I used fresh), and the jar of pasta sauce. Mix together and add the pasta, separating the pieces if necessary. Add about a 1/2 cup of grated cheese (whatever kind you like). Mix thoroughly.

  5. Place the mixture into a lasagna pan which has been sprayed with a non-stick spray. (I have one of those All Clad cast iron enamel roasting pans. It weighs a ton, but I love it.)
  6. Sprinkle with parmesan and any other cheese mix that you like.
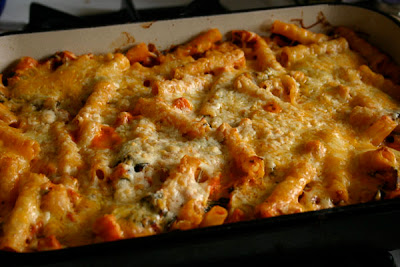
  7. Cover with foil and place in preheated oven. Bake for 40 minutes. Remove foil and bake another 15 minutes until cheese is golden and bubbly.

Notes: Eldest daughter loved the taste, but felt it needed more sauce. For now, I'm serving it with extra pasta sauce, but next time I need to make it "saucier." :)

Sunday, October 10, 2010

Iced Pumpkin Cookies

One of my favorite fall treats are the iced pumpkin scones from Starbucks. This cookie may be even better. In fact, I sometimes have one or two of these with my morning tea, just as I would enjoy a pumpkin scone. :) It is based on a recipe from allrecipes.com.

Iced Pumpkin Cookies

Cookie
  • 2-1/2 cup all purpose flour
  • 1 tsp baking powder
  • 1 tsp baking soda
  • 2 tsp ground cinnamon
  • 1/2 tsp ground nutmeg (I grate mine fresh)
  • 1/2 tsp ground cloves

  • 1/2 tsp salt
  • 1/2 cup butter, softened
  • 3/4 cup white sugar
  • 3/4 cup brown sugar
  • 1 cup canned pumpkin puree (I use Trader Joes organic pumpkin)
  • 1 egg
  • 1 tsp vanilla extract (I use my own vanilla that I made several years ago from vanilla beans and vodka)
Icing
  • 2 cups confectioner's sugar
  • 1 Tbsp butter, melted
  • 1 tsp vanilla extract
  • 3/4 tsp ground cinnamon (1 tsp is a bit spicey)
  • 3 Tbsp milk, or how ever much is needed to achieve proper consistency for drizzling or spreading, whichever is preferred

Preheat oven to 350°F. Combine flour, baking powder, baking soda, cinnamon, nutmeg, cloves, and salt. Set aside.

In a medium bowl, cream the butter and white sugar. Add the brown sugar, pumpkin, egg, and vanilla, and beat until creamy. Mix in dry ingredients.

Drop by spoonfuls onto ungreased cookie sheet.

Bake for 15 to 20 minutes (for large cookies) or 10 minutes (for dainty cookies) in the preheated oven. Cool cookies for a few minutes, and move to a wire rack.

While the cookies are baking, mix the icing. Add enough milk to achieve the desired consistency.

Once cookies are completely cooled, either drizzle, or spread, with the icing.

I store these loosely covered. They are moist and don't really appreciate an airtight container. Once the icing has hardened, store them single layer in a container with a loose lid.

Roasted Potato Medley

Oops. Once again I forgot to take a pic before eating had commenced.

There was so little manicotti left after Friday night's dinner, I had to find another recipe to augment Saturday's dinner. I didn't even have manicotti the next night, so the kids could have more (and I don't need that cheese anyway), but DD1 tells me that this potato dish was a nice side for the manicotti. She's asked me to make the manicotti again, immediately. :)

This recipe, based on a recipe from allrecipes.com, calls for sweet potatoes, russet potatoes, and red potatoes. I had sweet potatoes and red potatoes on hand, so I used those. I made a larger amount than called for, so I didn't really include amounts, because it depends on how many potatoes there are.

Roasted Potato Medley

  • sweet potatoes, cut into 1/2" cubes
  • red potatoes, cut into 1/2" cubes
  • olive oil
  • No-Chicken broth, about 3/4 cup
  • 1/2 tsp dried thyme (fresh would be good, but I had dried and it was great)
  • fig balsamic vinegar (regular balsamic would also work, but we love the fig balsamic from Mollie Stones)
  • 3 cubes frozen crushed garlic, defrosted

Preheat oven to 375°F.

In a mixing bowl placed the cubed potatoes and add the other ingredients. You really don't need too much olive oil (maybe none), but use an adequate amount of broth.

Spray roasting dish with non-stick spray. Add the veggies and put in the oven.

Set the timer for 15 minutes and then stir the veggies. Set the timer for another 15 minutes, then stir the veggies again. I roasted them for about 40 minutes total. The liquid mostly evaporates away leaving a very yummy residue for the tender taters.

Notes: Yum. This is very tasty. Both kids liked them and there were few left, even though I used almost an entire bag of each type of potato (from Trader Joes).

Friday, October 8, 2010

Spinach Manicotti

Wow, I goofed. I forgot to take a photo of the Manicotti right away and the hordes descended. I had to content myself with photographing the post-apocalyptic remains. An acrimonious fight ensued over how the remainder should be equitably divided.

This is slightly modified from the Barilla Manicotti box, which includes 6oz of mushrooms in the spinach saute. My youngest draws the line at mushrooms.

The soup and frittata, along with green salads with feta, got me through most of the week, but I figured I'd bring out the fattening pasta for the end of the week. I was paid in hugs. I also made a pumpkin pie this week – it was a special request, but was told that, while it was good, I should keep experimenting with other recipes. :)

Spinach Manicotti

  • 1 box (8oz) of Manicotti shells, such as Barilla
  • olive oil
  • 2 cubes of frozen crushed garlic, or two cloves, crushed
  • 1 bag (6 oz) of fresh spinach, chopped
  • 2 eggs
  • 1 container (15 oz) ricotta cheese
  • 1/3 cup chopped fresh basil
  • 1 tsp salt
  • 1 24 oz jar Marinara sauce
  • 1/2 cup freshly grated parmesan and gruyere (mixed)

Preheat oven to 350°F.

Cook manicotti as directed on package. Cool on wire rack, separating each piece.

Heat oil in large skillet over medium heat. Add garlic and saute briefly. Add spinach and continue to saute approx 5 minutes. Set aside to cool.

Beat eggs lightly in medium bowl. Stir in ricotta, basil, and salt. Stir in cooked spinach.

Spray 14x9x2 baking dish with nonstick spray. Spread 3/4 cup marinara sauce over the bottom of the baking dish. Fill manicotti and arrange single layer in dish. Pour remaining sauce over shells. Sprinkle with 1/2 cup cheese. Cover with foil. Bake for 30 minutes. Uncover and continue baking 5-10 minutes or until cheese is melted.

Notes:

Wow, the extra garlic makes this soooo good. This causes fights in my house.

Tuesday, October 5, 2010

Whole Grain Chocolate Chip Cookies

Back when my eldest was in 8th grade, we had to provide treats once a month or so for a bake sale. The students were raising money for their end-of-year trip. I was very into cooking at the time, so I enjoyed searching out new recipes to try, especially recipes that used whole grains and were also delicious.

About that time, King Arthur Flour came out with a whole grain cookbook and they published a chocolate chip cookie recipe in their catalog, also published in the book, that used barley flour. They also have this recipe available online.

Barley flour. I am a huge fan of barley. I am a fan of all sorts of grains, but especially barley. It has always bothered me how wheat-centric food is in this country. Yes, it has all the gluten going for it, but there are other grains!!! Grains with more flavor, and much more nutrition!

Home ground barley flour

I actually have a fancy shmancy grinder, but it's put away. Deep into some recess of my home, I'm not even sure where. I also have a Vitamix mixer. One of my best purchases ever was a Vitamix. It came with two mixing containers and one can grind grain. I use it to grind my own barley flour - so it's as fresh as can be and so easy to clean up. I've also used it to make bean flours, using dried beans. Bean flours are great. They are especially good for thickening up soups and gravies. This recipe calls for barley flour, which you can substitute with whole wheat. I never have, though, since barley imparts such a nice, nutty flavor. (You can also purchase ground barley flour from such places like Whole Foods, but make sure to keep it frozen or refrigerated because whole grain flours go rancid quickly.)

This recipe has some other special twists, such as the espresso powder, and the cider vinegar. When I first made this recipe, I did not have enough chocolate chips on hand, so I added milk chocolate chips and white chocolate chips to add up to the 2-2/3 cups required. I think it's best when you use a ratio such that there are mostly semi sweet chips, then a lesser amount of milk chocolate chips and an even lesser amount of white chocolate chips. Of course, do whatever appeals to you.

So, I made this once or twice for the 8th grade bake sale, and it sold well. Then, the following year, a good friend was entering the 8th grade Bake Sale Zone, and she asked me for suggestions. I gave her this recipe, along with my own 3-types-of-chips twist (though she developed the perfect ratio). She made a batch, which sold so well that she was asked by the Bake Sale Czar to make the same cookie every week all year. It's a seriously good recipe, but most of the King Arthur recipes are good.

Classic Crunchy Chocolate Chip Cookies

Light and crisp, absolutely packed with chocolate chips, this is the quintessential crunchy chocolate chip cookie. The addition of barley flour to the dough gives the cookies a pleasant, mild taste. To ensure crunchiness, be sure to bake these cookies thoroughly; they should be golden brown all over, without any hint of softness in the center.

  • 1/4 cup (1/2 stick, 2 ounces) unsalted butter
  • 1/2 cup vegetable oil
  • 3/4 cup granulated sugar
  • 3/4 cup brown sugar, firmly packed
  • 2 teaspoons vanilla extract
  • 1/2 teaspoon espresso powder, optional
  • 3/4 teaspoon salt
  • 1 tablespoon cider vinegar
  • 1 large egg
  • 1/2 teaspoon baking soda
  • 1/2 teaspoon baking powder
  • 1 cup whole barley flour*
  • 1 cup King Arthur whole wheat flour, Traditional or White Whole Wheat
  • 2 2/3 cups (16 ounces) semisweet chocolate chips (as mentioned, I mix semisweet, milk chocolate and white chocolate chips together for an extra fancy cookie)

*Or substitute whole wheat flour for the barley flour.

Preheat the oven to 350°F. Lightly grease (or line with parchment) two baking sheets. In a large bowl, beat together the butter, oil, sugars, vanilla, espresso powder, and salt till smooth. Beat in the vinegar, egg, baking soda, and baking powder. Stir in the barley flour and whole wheat flour, then the chocolate chips. The dough will appear oily, and because of the quantity of chocolate chips, it won't be completely cohesive; that's OK.

Drop the dough, by tablespoonfuls, onto the prepared baking sheets. Bake for 15 to 17 minutes, until the cookies are an even golden brown. Remove from the oven, and allow to cool for 5 minutes before transferring to a rack to cool completely. Yield: 33 cookies.

Notes:

If you like to eat raw cookie dough, this is probably not the recipe for you. The raw dough is a bit oily, and kinda weird. It's much better when cooked.

Zucchini Pie

Several days ago my eldest daughter asked me if I could make "that zucchini pie you used to make." I stared at her blankly. I had no idea what she was referring to. It took me a few minutes, but I finally dredged up a memory of a dish that I used to make for my kids. I made it a lot.

This recipe, created by Donna, the owner of the Yahoo vegetarian_group, is a really great recipe. It's similar to a frittata or crust-less quiche, but uses egg whites, and loads of zucchini and other veggies. But you can easily change up the veggies to use whatever you want. It does contain eggs and cheese, but you can make it vegan by substituting egg replacer and your favorite faux cheese. It is delicious at room temperature and was a staple in my kids lunchboxes, back when I made their lunches. It was always a favorite and my kids have been known to fight over the last slice. How could I have forgotten about it?

I made this one last night, took a photo, placed a towel over it to cool, and then went off to bed. I am so glad that I took a photo right out of the oven, because when I got up this morning, it was missing two large slices. I suspect they ate it for breakfast, because today is parent-provided hot lunch day at school and I gave each of them $6 to buy lunch.

So, thanks to Donna for a really great recipe! If you join the yahoo group, they have a huge files section full of a ton of recipes submitted by members.

Another nice feature of this recipe is I get to use my fluted ceramic quiche pan. I can't remember where I got it, but this is pretty much the only thing I use it for. By the way, this is my version of the recipe, which is mostly identical to hers, with the one exception that I also grate the onion. I also add a lot more fresh basil. I keep a basil plant over my kitchen sink at all times. This can be prepared in one bowl - at least that's the way I do it. :)

Zucchini Pie

  • 3 cups grated zucchini
  • 1 grated carrot (optional, but I like to include it)
  • 1 grated onion
  • 1 cup flour (whole wheat or white)
  • 1 cup grated provolone or mild cheddar (or substitute another cheese or faux cheese)
  • 1/4 cup canola or vegetable oil
  • 3 egg whites beaten (or egg replacer to equal - I don't bother beating the egg whites)
  • 3 Tbsp grated Parmesan (you can omit this, but I use it)
  • 2 tsp chopped basil, parsley or chives (dried or fresh - I use fresh basil, and more of it)
  • 1 tsp baking powder
  • 1 tsp salt (regular, kosher, or sea salt)

Preheat oven to 350° F. Combine all ingredients in a large bowl and mix well. Spoon zucchini mixture into a 10 inch glass pie or quiche plate that has been coated with vegetable cooking spray. Bake for 45-50 minutes or until golden brown. Cool for 15 minutes before slicing. This stores well as a leftover for lunch the next day also.

Notes:

I slice it, wrap each slice individually, and place them in the fridge where the kids can just grab one. By the way, this is not a favorite recipe of mine. I am not a big lover of egg-centric dishes, so I generally make it just for the kids.

Monday, October 4, 2010

Roasted Root Vegetable Soup

When I was at the grocery store with the "good vegetables" last week, I looked around to see what appealed to me. Of course, I should have thought about this before leaving for the grocery store, but there you go. :)

Our weather has turned very foggy and cold. Yup, Fall has arrived (though I don't kid myself - we will be seeing more hot weather before Halloween). I found myself attracted to all the root vegetables, so I bought a variety. At home, I already had some acorn squash from Trader Joes - I really like acorn squash and try to keep it on hand when in season. I also picked up two quarts of my favorite soup broth - Organic No-Chicken Broth by Imagine.

When I got home, I looked up some recipes and I found this Winter Root Vegetable Soup recipe on allrecipes.com, my favorite recipe site. I decided to adapt it to what I had on hand. I did make some changes. For example, neither I nor my daughters need all that heavy cream, so I left it out. I sauteed the onion in olive oil, not butter. I also did not puree the soup, as we love vegetable soup with chunks of veggies around here. I grated up some Gruyere cheese to add as a garnish. Yum.

Roasted Root Vegetable Soup

  • 2 parsnips, peeled and cut into 1/2"(ish) cubes
  • 2 turnips, peeled and cut into 1/2"(ish) cubes
  • 4 (smallish) carrots, peeled and cut into 1/2"(ish) cubes
  • 1 rutabaga, peeled and cut into 1/2"(ish) cubes
  • 1 acorn squash, cut in half, seeds removed, and flesh removed with a melon baller
  • 2 Idaho potatoes, peeled and cut into 1/2" (ish) cubes
  • olive oil
  • salt
  • pepper
  • 1 Tbsp Herbs du Provence
  • 1 onion, diced
  • 3 cubes of frozen crushed garlic (diced fresh cloves would work)
  • 2 quarts vegetable broth (I used No-Chicken broth)
  • grated Gruyere cheese for garnish

Two of my favorite products. No-Chicken Broth and frozen crushed garlic (from Trader Joes).

Preheat the oven to 425° F. Prepare all the root veggies and the acorn squash. I could not fit them into one pan, so I used my two smallish cookie sheets that have a 1" lip. Divide the veggies between the two pans, drizzle olive oil over each, and then some salt and pepper. Mix to distribute the oil and seasonings. Put into preheated oven and stir every 15 minutes until done - I roasted each pan about 38-40 minutes.

Veggies about to be roasted (left) and Veggies roasted (right)

Next, dice the onion. (I would have also used celery as called for in the original recipe, if I'd had any.) Heat a soup pot, add some olive oil, and saute the onion. Add the garlic. When the onion is soft and translucent, add the broth. Bring to a gentle simmer and add the roasted veggies. Also add the Herbs de Provence (or whatever seasoning you prefer).

Simmer, very gently, about 30 minutes, or until the flavors come together. Taste and adjust seasoning as needed. Grate some Gruyere and serve as a garnish in each bowl.

Top picture is at the beginning of simmering, bottom picture is when I warmed it for dinner - much more like a stew.

Notes:

OMIGOSH. I can't believe how yummy this soup was when warmed up. My plans of serving it with a salad or another side dish went up in smoke - no time to prepare. The kids dove in, eating it with the grated Gruyere and sliced whole wheat sourdough. My mouth is SO HAPPY! I doubt there will be enough for another full meal as those kids had multiple servings. ;)

  • Carnivore's rating (DD1): 4.5/5
  • Vegetarian's rating (DD2): 4.8/5
  • My rating: 5/5

Post #1- Here we go

I am really not a cook. I mean, I can cook, if I have to. But I usually choose not to. When I was a teenager, my mother would sometimes insist that I cook for the family, and my meals were along the lines of (boxed) macaroni and cheese, and hot dogs. Or Hamburger Helper. This was before I became a vegetarian at the age of 17, just after graduating high school.

I married a man who seriously loved to cook. It was a mostly perfect arrangement. :) Well, except for the time he tortured me during my first pregnancy by "healthy" foods that only made me want to vomit. But it was mostly a pretty good run for 10 years.

We divorced when the kids were 4 and 6, so I had to start cooking, at least some of the time. And I did, though not always with much enthusiasm. But sometimes I was into it. As the kids became teenagers, I started to feel that they should participate in the process more. When they didn't want to, I cooked less and less and we did more takeout or frozen meals. I am pretty easy that way. ;)

However, the kids have recently been more vocal about the lack of cooked foods in the house. So much so that the youngest is actually spending more time at dad's house. Harumph. You just can't please some people. :)

Since they really don't have a lot of time to cook themselves, especially the dancer, I am going to try and make a bit more effort. I am going to log my work here, mostly because I forget about it otherwise. For example, several days ago DD1 asked me to make "that zucchini pie you used to make." I seriously had no idea what she was talking about though, after several minutes, I did vaguely remember. I still have to go unearth the recipe, but I remember where it is online.

I don't want to dilute my sewing blog with cooking posts, so here we are.

So, this blog is mostly for me, but if it's useful to anyone else, I will be happy about that. When I do cook, I generally lose weight. I am not counting on that, but it would be a bonus. ;)

So, my beloved teen units, this is for you. You'd better appreciate it. ;)